A blog post supports a website’s broader content strategy by addressing specific goals and explaining how to achieve them.
As a content writer, you should set your writing goals around 3 key objectives. First, your content should help a website rank in organic search results. Second, it should be clear and well-supported enough to be understood and quoted by AI-generated search features when appropriate. Third, it should guide users by answering their real questions about a topic, product, or service.
What’s SEO Blog Content Writing?
A great blog is one of the key components of an SEO plan. It serves as an overview of your business and the topics, services, and ideas surrounding it.
SEO blog writing in 2026 is creating content so that it can rank organically and be understood by AI-generated search features. The core parts of SEO blog writing include keyword research, search intent, post structure, on-page technical optimization, internal linking, and reliable sourcing.
From there, by combining these elements, you can create blog posts that address consumers’ needs and answer their questions.
Remember, your blog post is at the core of your SEO strategy. That’s why we’ve written this guide: to help you create blog content that matches your business goals.
8 Core Parts of SEO Blog Writing
- Keyword Research
- Search Intent
- Audience Questions and AI Prompts
- SERP Analysis
- Post Outline, Structure & First Draft
- Technical SEO & On-page Optimization
- Internal and External Links
- Indexing, Crawling & Measurement
Now, let’s look at how each of these elements contributes to effective SEO blog writing.
So where should you start?
Step 1: Plan Keyword Research
Keyword research is first on this list because it has to be finished before anything else starts.
That’s because if you choose the wrong keywords, begin writing, and later realize they are unsuitable, all the work you put into the remaining details may be wasted.
We have recently published a blog post featuring the top 5 keyword research tools for modern SEO, along with a step-by-step guide.
To help get ideas, here are the basic steps of keyword research in SEMrush:
Keyword Overview
SEMrush’s keyword overview provides a feature to analyze any keyword quickly. Begin by navigating to the tool.
Open the Keyword Overview tool and enter your broad idea. Throughout this article, we’ll explore “content writing” as our example topic.
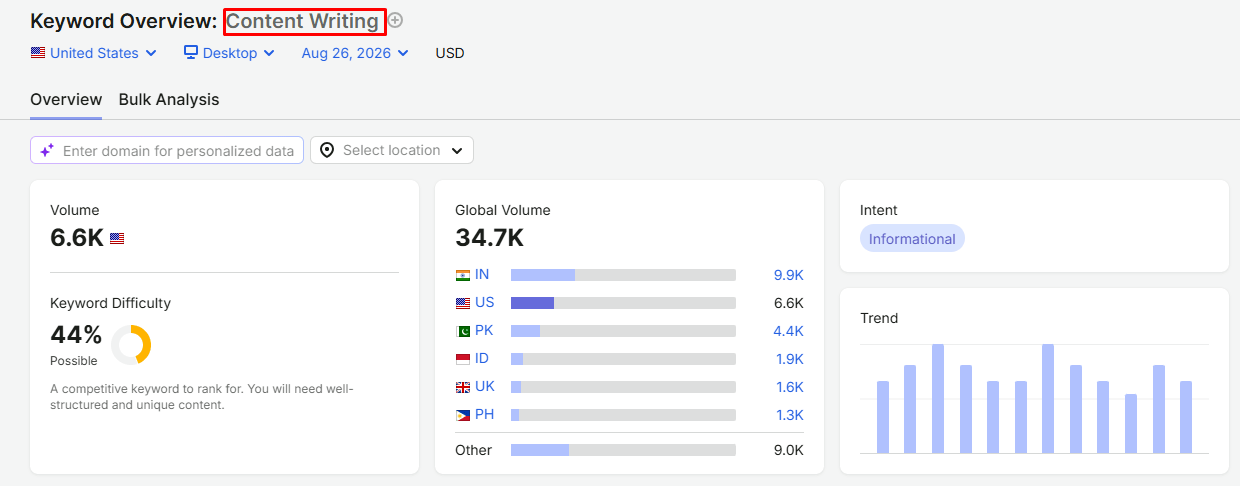
This section contains details of search volume, keyword difficulty, global volume, intent, keyword ideas, and SERP details. Treat these metrics as directional evidence rather than absolute truth.
Now, it’s time to research and explore keyword ideas through the Keywords Magic tool.
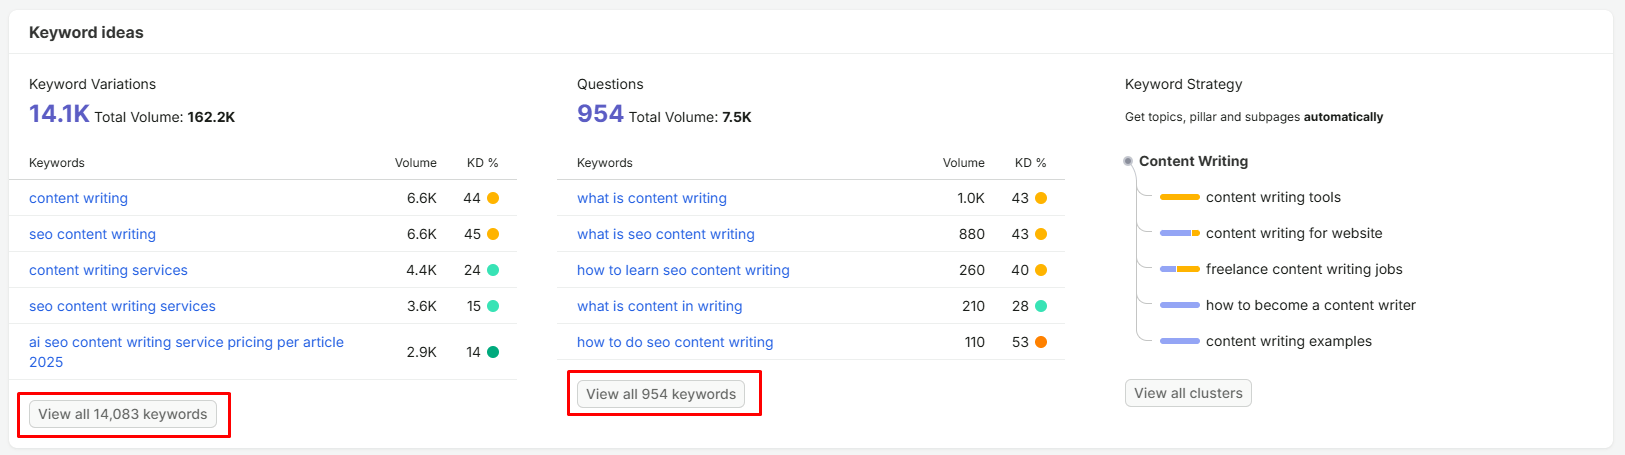
Keyword Magic Tool
Click on View all keywords, and it will take you to the Keyword Magic Tool. Now we have a raw list of 14,314 keywords.
In this section, you don’t need to review all 14,314 keywords results and sort by volume, skim the top few hundred, and note the ones that actually match your topic.
Be sure to filter keywords succinctly: The What, Why, and How to get relevant ideas.
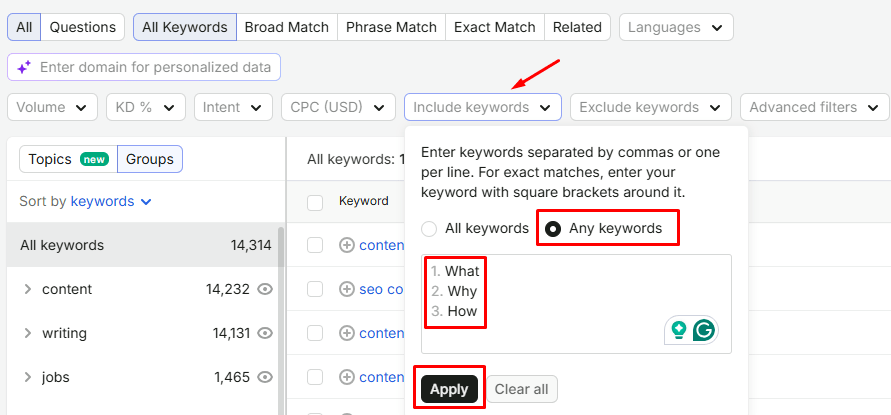
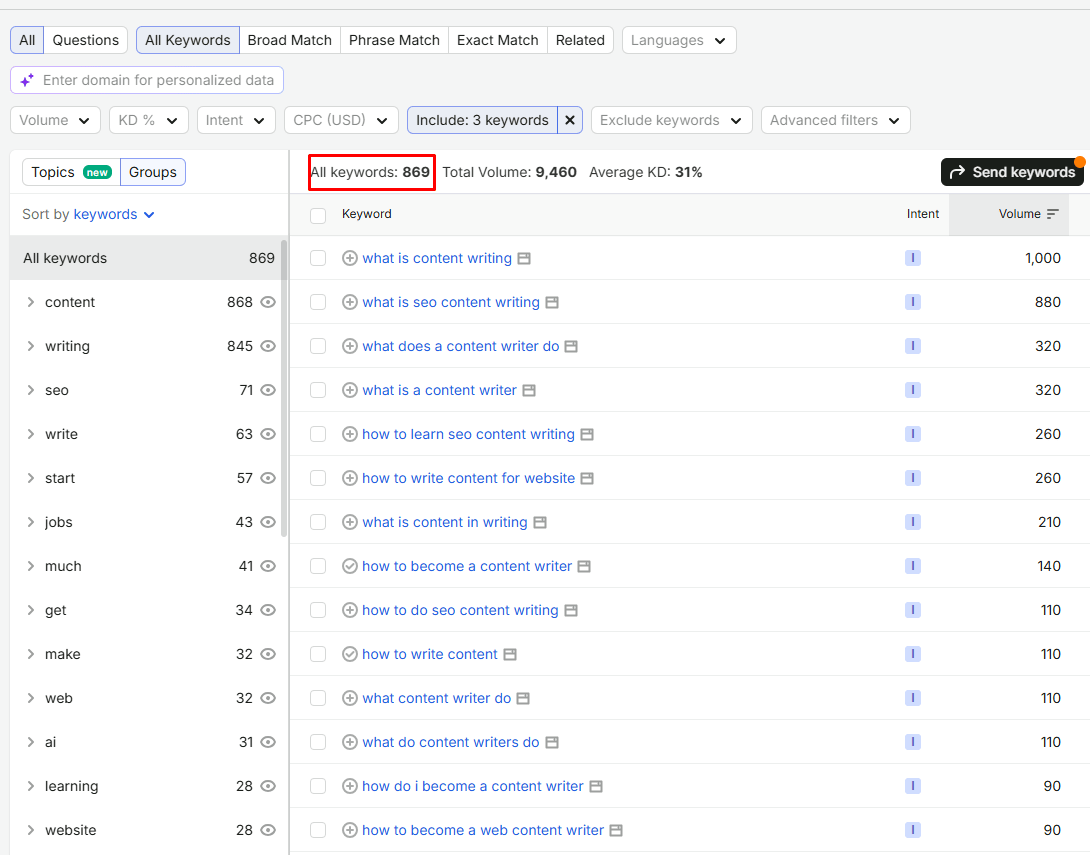
Now we have filtered only 869 list of keywords.
Next, we can refine research even further by finding low-competition keywords. To do this, we will use a KD filter.
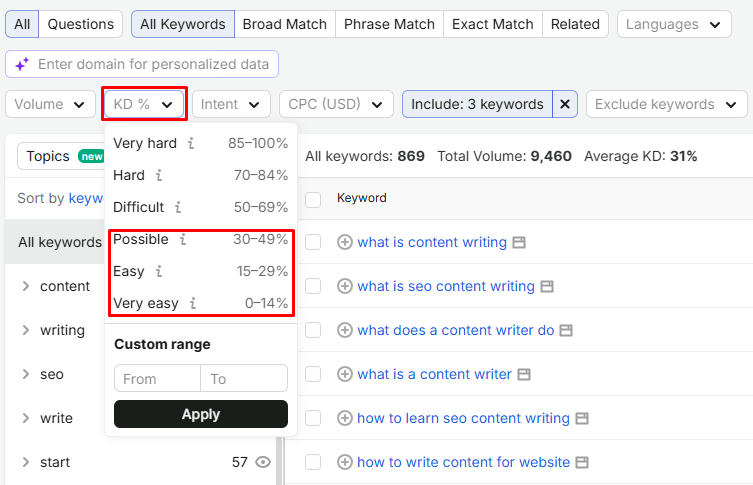
- If your website is new with a SEMrush Authority Rating between 0-10, focus on keywords with a very easy KD filter.
- For sites with a SEMrush Authority Rating of 10- 20, use easy KD keywords.
Anything above is your strategy for choosing which keywords.
On top of this, prioritize informational intent terms. Normally, the next step would be to select the good keywords and choose Send keywords → Keyword Strategy Builder.
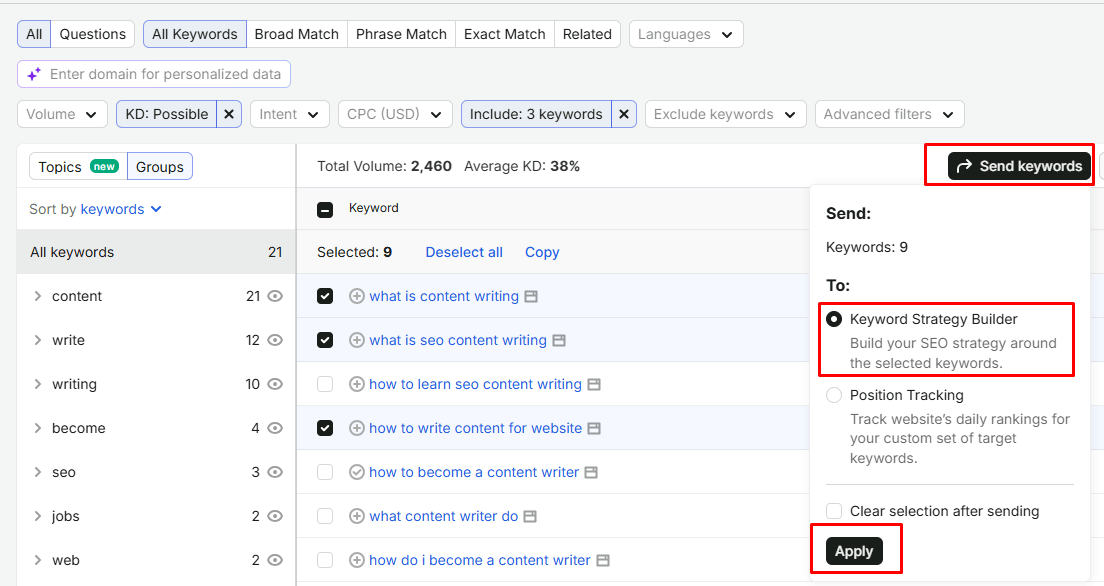
However, for this research, SEMrush created a structured, seed-based list directly so that the complete topical map could be evaluated.
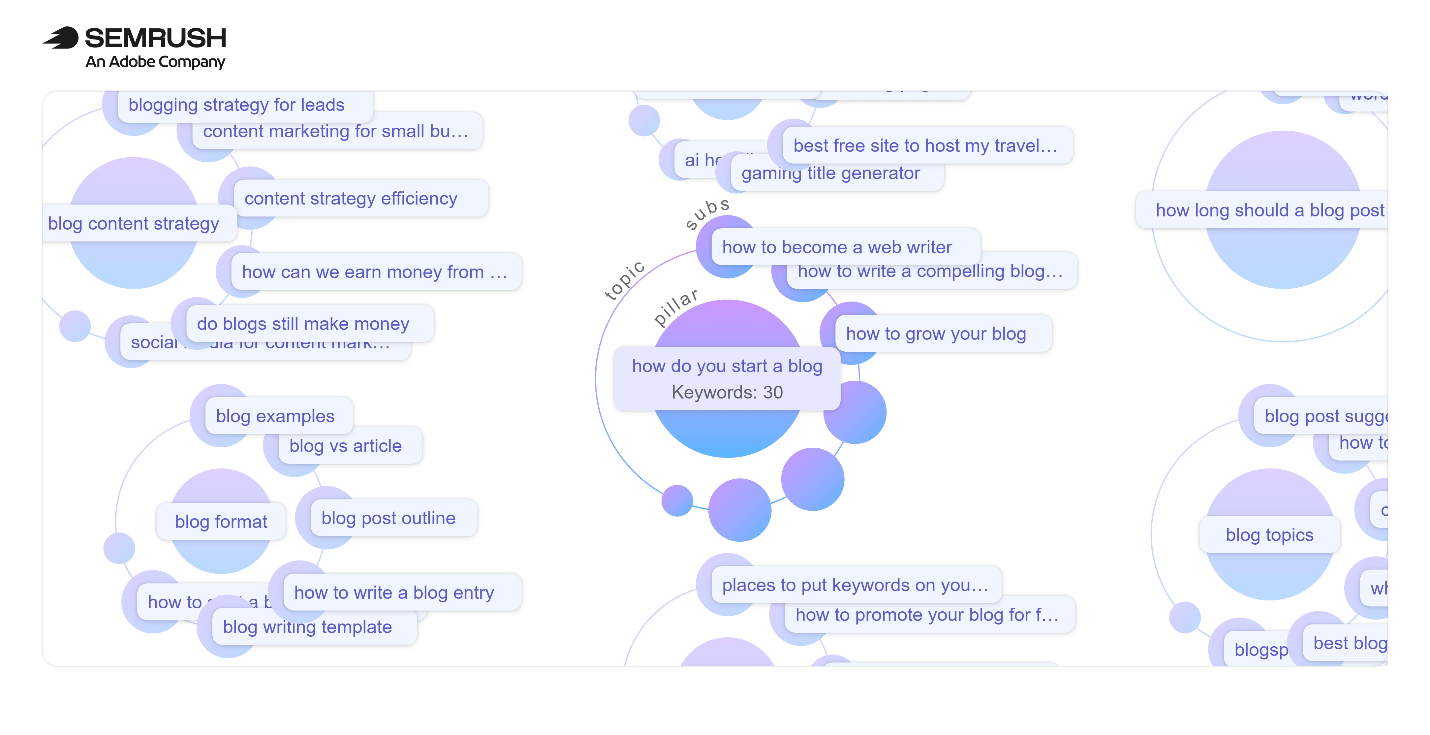
This is also a great opportunity to identify the topic clusters and separate the closest-fit writing-content cluster from broader future topics.
Next, we will study Search Intent.
Step 2: Understanding User Intent
The real value of keyword research lies not only in finding target keywords but also in understanding the needs and expectations behind them. So, we must understand what users hope to accomplish with each search.
There are 5 main types of search intent, but for blog writing, it is especially important to focus on commercial and informational intent. Let’s look at an example of each.
Commercial Intent
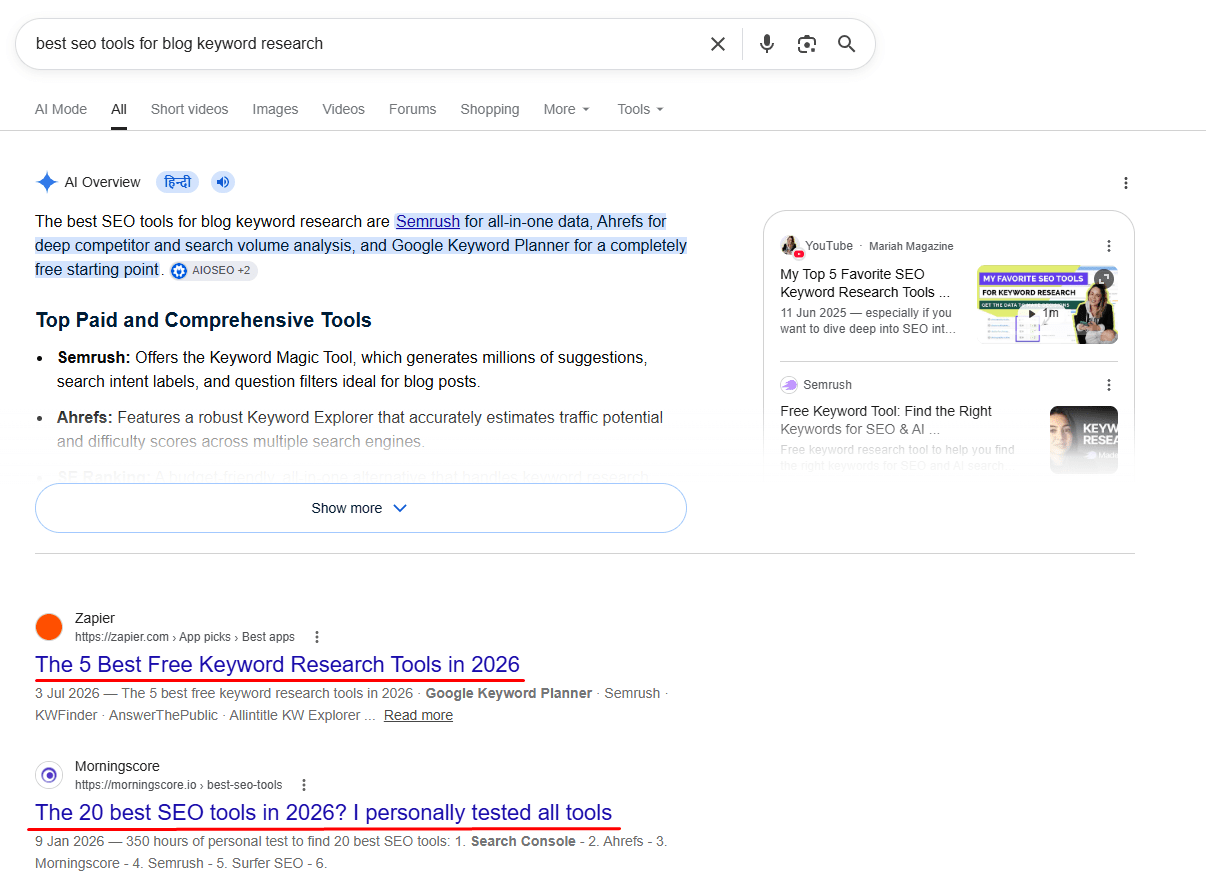
If you offer a SaaS product or service related to SEO, you might target a topic such as “best SEO tools for blog keyword research.” Because users searching this phrase are comparing their options before making a decision, the top results are likely to be list-style articles that review or compare different tools.
Informational Intent:
As the name suggests, informational intent refers to searches in which users are looking for information about a topic, product, or service.
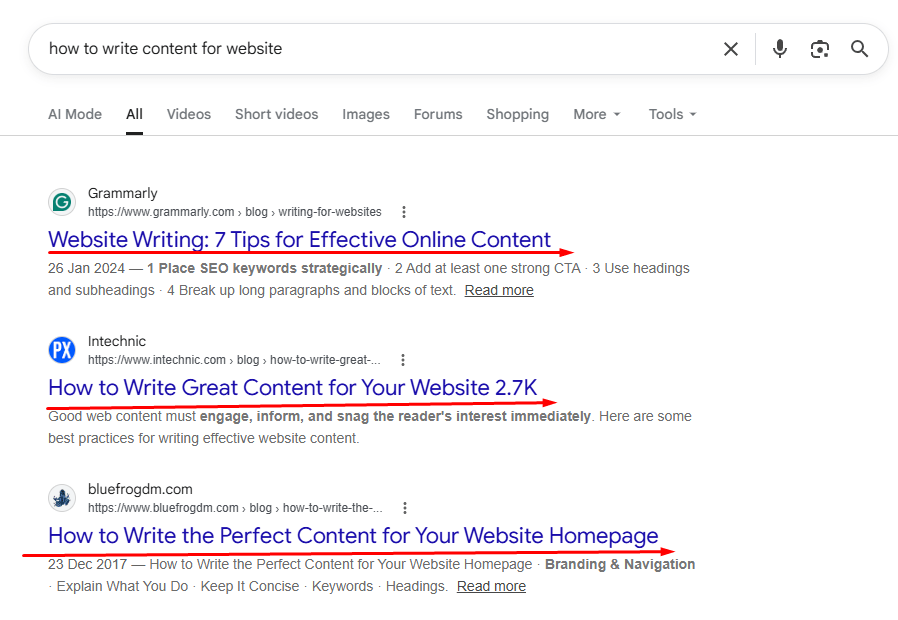
Once you have identified relevant, low-competition keywords with search intent, the next step is to analyze AI prompts. This will help you create a blog post that performs well in both traditional search results and AI-generated answers.
Step 3: AI Prompts
AI prompt research can be a powerful strategy for optimizing blog posts and increasing their chances of being cited in AI-generated answers. I conduct in-depth prompt research with Searchable Prompt Research tool.
Note: it’s not like normal research tool, first you need to setup your project there.
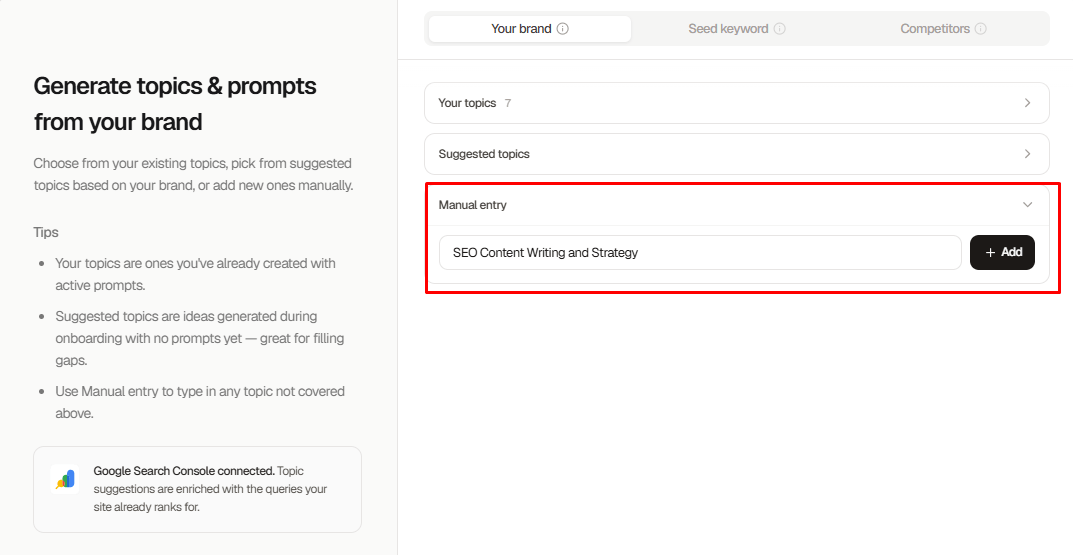
Add Your Topic
Begin with the first step as the broad topic you want to research.
Configure the Research Settings
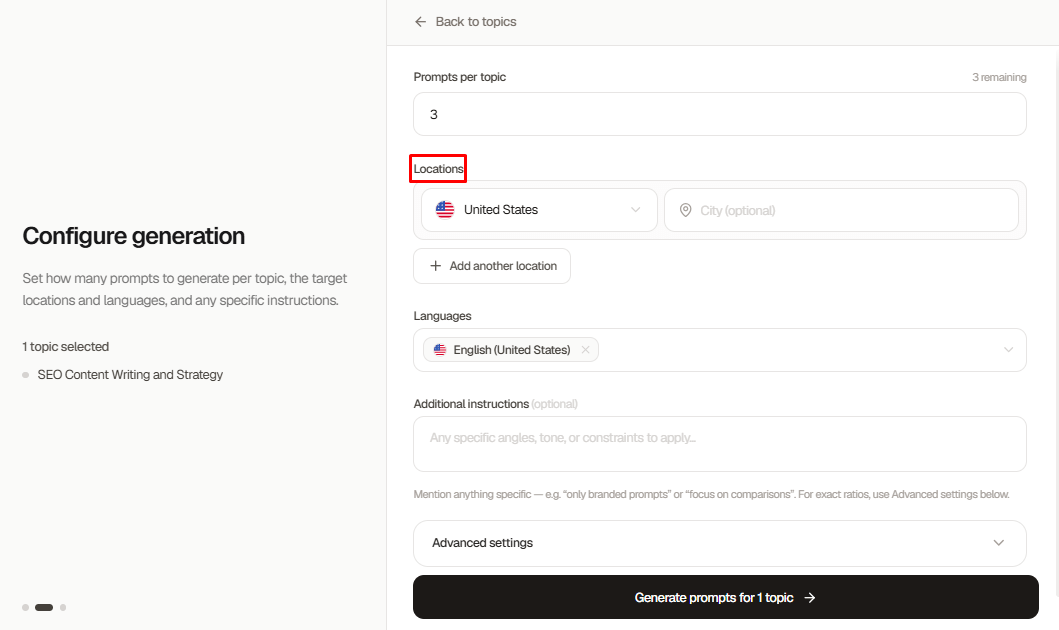
Next, configure the research setting to generate prompts based on the topic.
Followed by basis setting like:
- Prompts per topic
- Location: United States
- Languages
You can also add extra instructions to make the results more relevant.
For example:
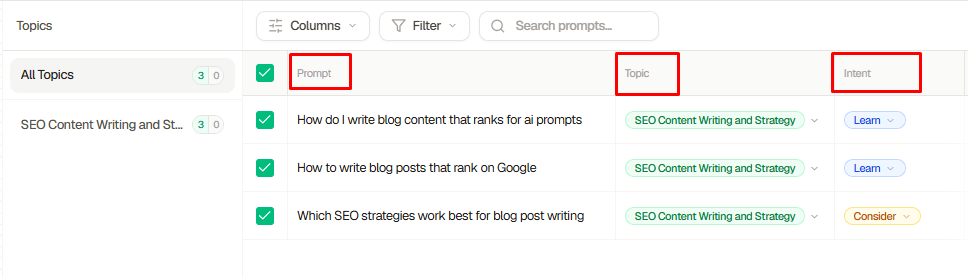
Focus on questions asked by business owners and marketing managers who want to create SEO blog content that ranks on Google and appears in AI-generated answers.
When you give more specific instructions, you usually get better and more useful prompt ideas.
Generate the Prompts
After selecting the settings and generate the prompts for your topic. The tool will create different ways users may search for or ask about the subject.
Step 4: SERP Analysis
You may be wondering who your competition is for the selected keywords. To find out, open an incognito window and search for your target keyword. Before creating the blog outline, we’ll analyze 3 key factors.
Format
A top-ranking analysis can generally be broken into the following results, i.e., step-by-step guides, listicles, comparisons, etc. For example, if the results for “how to do SEO content writing” are dominated by step-by-step tutorials, publishing a simple list of SEO tips may struggle to rank even if the information is accurate and well written.
Trend
Review the top-ranking SERP results and check their publication and update dates. Because “how to do SEO content writing” is a fast-changing topic due to the rise of AI, outdated content may present an opportunity. If the leading pages have not been updated recently, you can create a more current and comprehensive guide to compete for their rankings.
The Answer Box
If you want your content to appear in an answer box, analyze which websites are cited and which sentences are selected by AI. These examples provide a useful discovery to optimize the content.
Step 5: Post Outline, Structure & First Draft
Outlining means a roadmap for the structure, formatting, key information, statistics, and talking points needed to create high-quality blog content.
Before creating your blog outline, study the top 10 SERP results for your target keyword and check out the following:
- Total word count
- AI overview
- H1–H6 heading structure
- Topics covered
- Content Gaps
- Calls to action
and overall user experience. After brainstorming, use these insights to build an outline that matches the search intent while offering more value than the competing pages.
Here is an example of a perfect SEO Blog Post Template:
- Primary keyword: Select the primary keyword as the focus keyword.
- Secondary Keywords: Finalize 2-4 secondary keywords.
- AI prompts: Add 2-3 AI searches
- Post Title: Add primary keyword
- Meta Title: Add primary keyword
- Meta description: Optimal meta description length: 180 characters; add the primary keyword at least once and include a secondary idea.
- H1 Tag: Add primary keyword
- H2 to H3: Add semantic ideas in h2 –h3 headings
- Text: 1000+ Words (based on SERP review)
- Body Content: Incorporate semantic ideas naturally in content and focus more on query-based solutions.
Let’s look at the outline of our next blog post on How to Track AI Traffic in GA4.
I used two methods to create the final blog outline:
1. Using an AI Tool
You can use any AI writing tool to generate an outline. For this article, I used Manus AI.
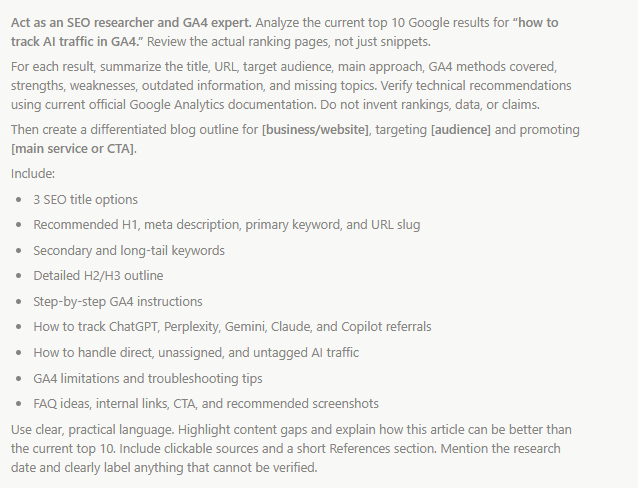
Here is a custom prompt you can use:
Act as an SEO researcher and GA4 expert. Analyze the current top 10 Google results for “how to track AI traffic in GA4.” Review the actual ranking pages, not just snippets.
For each result, summarize the title, URL, target audience, main approach, GA4 methods covered, strengths, weaknesses, outdated information, and missing topics. Verify technical recommendations using current official Google Analytics documentation. Do not invent rankings, data, or claims.
Then create a differentiated blog outline for [business/website], targeting [audience] and promoting [main service or CTA].
Include:
- 3 SEO title options
- Recommended H1, meta description, primary keyword, and URL slug
- Secondary and long-tail keywords
- Detailed H2/H3 outline
- Step-by-step GA4 instructions
- How to track ChatGPT, Perplexity, Gemini, Claude, and Copilot referrals
- How to handle direct, unassigned, and untagged AI traffic
- GA4 limitations and troubleshooting tips
- FAQ ideas, internal links, CTA, and recommended screenshots
Use clear, practical language. Highlight content gaps and explain how this article can be better than the current top 10. Include clickable sources and a short References section. Mention the research date and clearly label anything that cannot be verified.
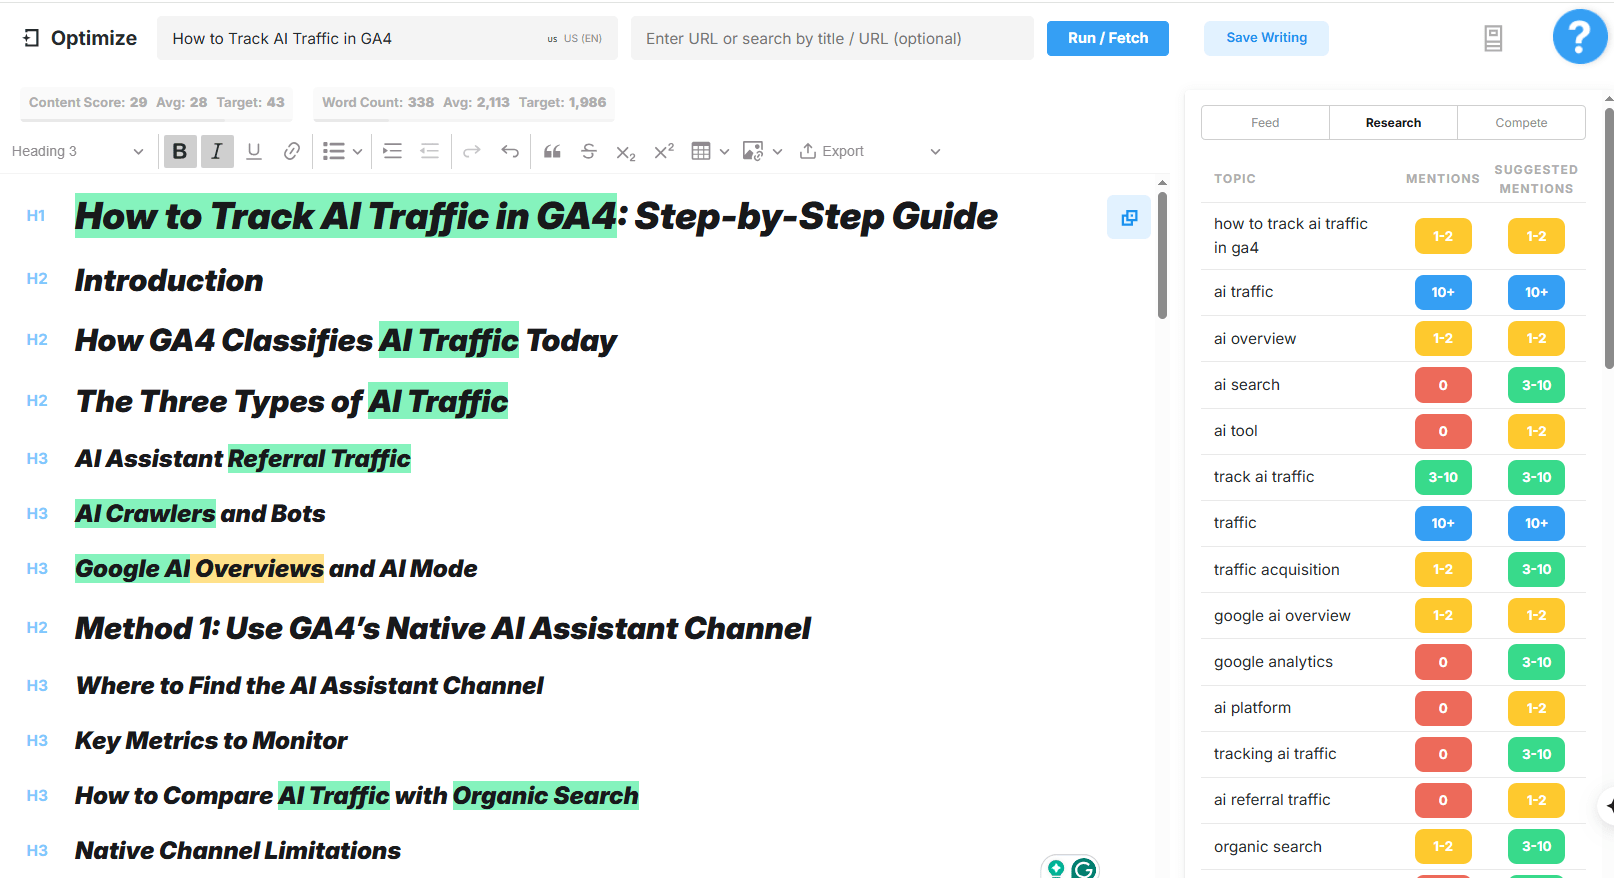
2. Using MarketMuse
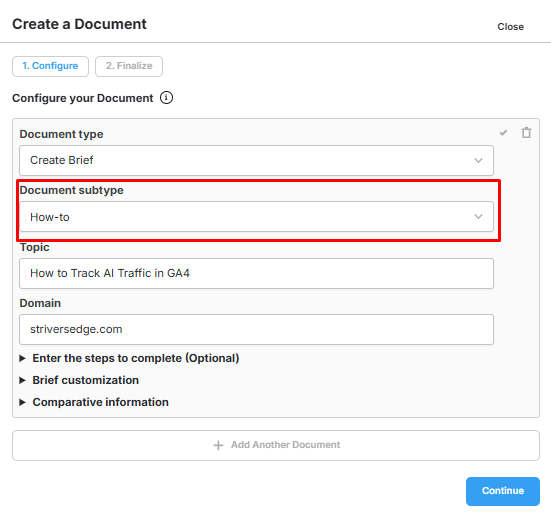
You can also create an outline with MarketMuse. Start by navigating to Create Document, select Content Brief, and enter the required information. One of the most important steps is choosing the correct document subtype. Because our topic is a how-to guide, so I selected How-To.
Now that you have your outline or template, let’s use this outline to develop the complete blog post.
After completing the outline, begin the writing stage by focusing on readability, and make sure to avoid long paragraphs, as they can make the content difficult to scan and discourage readers from continuing.
Remember, keyword density stopped mattering a decade ago, so include relevant keyword variations naturally so the post can reach the right audience through search. What still helps is coverage, meaning the related terms and ideas a thorough writer would naturally include.
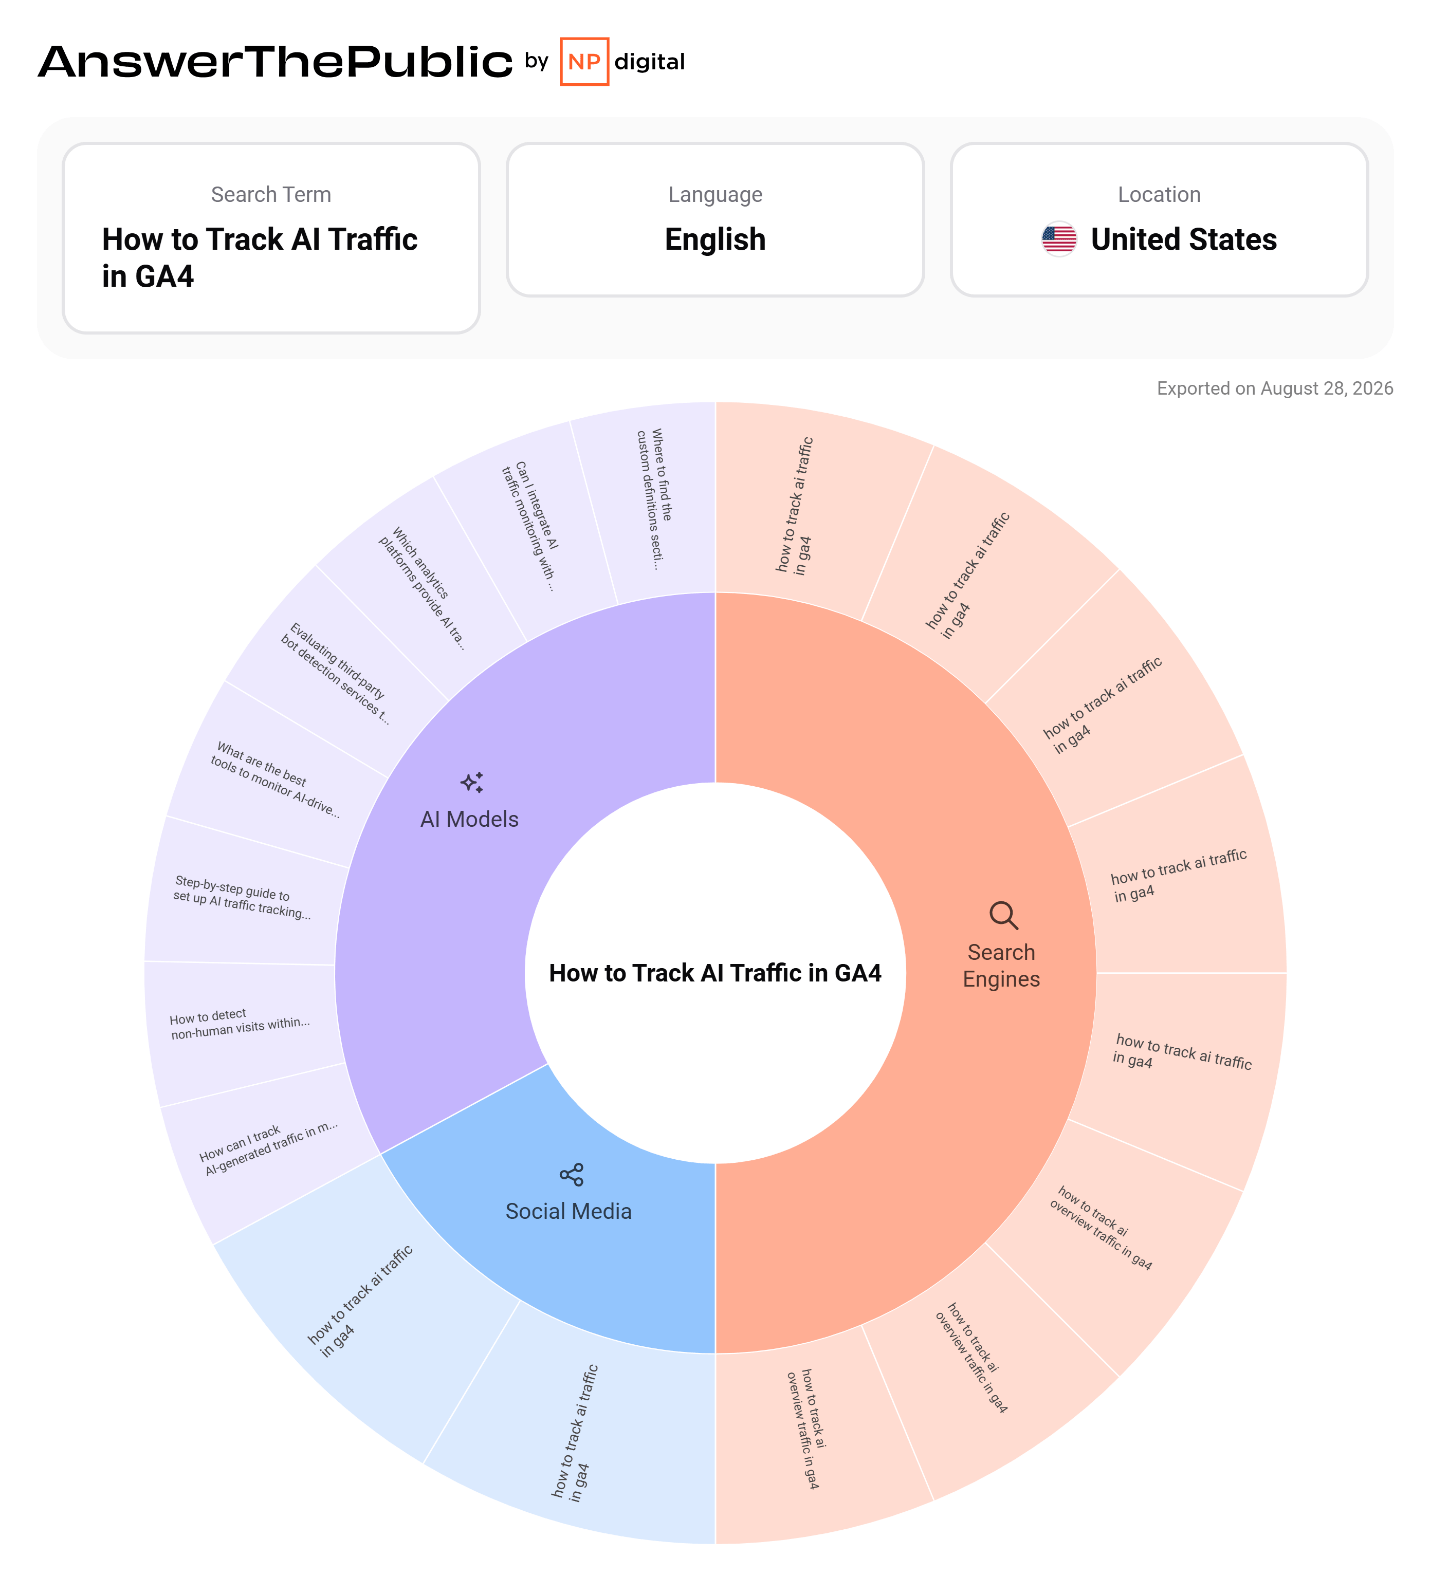
You can use a free tool like Answer the Public to discover related keywords and topics connected to your primary keyword.
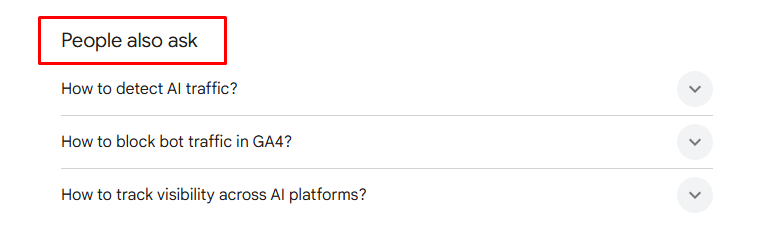
Also use Google’s “People Also Ask” feature to discover related questions.
There are a lot of writing assistant tools like Clearscope and Surfer that can help speed up the content-creation process, but for this guide, I use MarketMuse.
Step 6: Technical & On-page SEO Optimization
Once our content copy is well written, the next step is to make sure the article is technically ready for search engines. Here are quick steps to follow:
Device Responsive:
Very first what you need to optimize the post for phone, tablet, and desktop computer devices.

Meta Tags:
In your blog post, add a meta title and meta description to help search engines understand the page and display it appropriately in search results.

If you use WordPress, you can add these meta tags with the Yoast SEO plugin by editing the post, but make sure the plugin is installed and activated in the WordPress dashboard.
Image Alt text and file name:
Google uses image file names and alt text to understand the images you upload to a blog or website. In other words, descriptive image file names and accurate alt text can support your SEO efforts.
For example: (This will be the image name and alt text I will upload to my next blog)
- “ga4-traffic-acquisition-ai-assistant.png”
- “GA4 Traffic Acquisition report displaying AI Assistant traffic sources”
URL structure:
Next, before publishing your post, make sure the URL slug is clean, concise, and relevant to the page’s content. That’s because it helps search engines understand the page’s content and can influence how the page appears in search results.
This is the slug I am choosing for the next post:
- “/tracking-ai-traffic-in-ga4-a-step-by-step-guide/”
Schema Markup:
Article Schema markup is a simple way to help search engines and AI systems understand what your post content means.
Basically, you can add schema either through a dedicated schema plugin or directly to the HTML code before the closing </body> section of the post.
Here is an example of article schema:
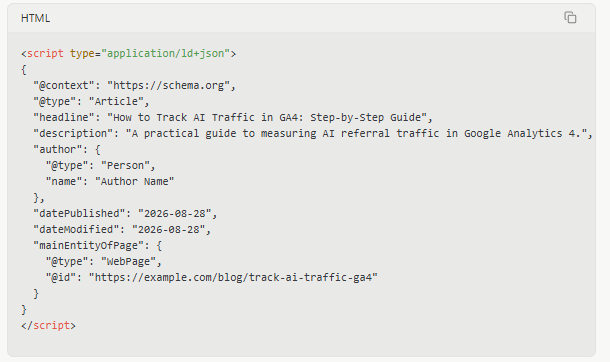
Table of Contents
Table of Contents is meant to improve experience for readers by organizes the sections of a post.
Below is an example TOC that you can add automatically generated by Easy Table of Contents WordPress plugin.
Step 7: Internal and External Links
Before publishing the blog post, do two things: find the older posts that should link to this one, and find trustworthy external sources this post should link out to.
I usually do this via an AI tool or use Google operators sometimes.
Here we do internal links in 2 ways:
- From existing posts to new posts
- From new posts to existing posts
For both ways, type site:yourdomain.com “your target keyword” into Google, and you will get every page/post on your site that already touches the keyword.
Now decide your internal links.
Step 8: Indexing & Crawling
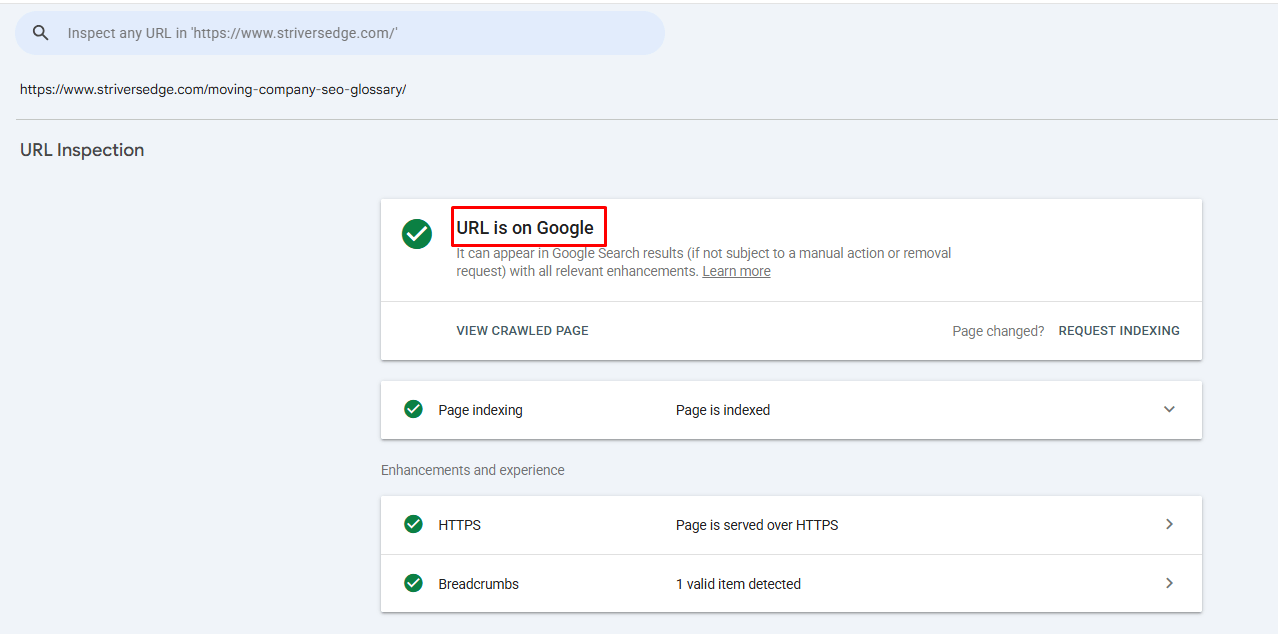
After publishing your post, make sure that search engines can find and index the blog. To check this manually, open Google Search Console and select URL Inspection. Enter your post’s URL in the inspection bar and press Enter.
Google Search Console will show whether the page is available for indexing or not. If it has not been indexed, click Request Indexing. Indexing may take anywhere from a few hours to several days, so the post may not appear in Google’s search results immediately.
If you want your blog post to rank well and get cited, then you need to do proper research and optimization from keyword research to indexing the post.
By following above steps together, your blog will do a better job of meeting your readers’ needs, supporting your business goals, and showing up in both search engine and AI results.

Mandeep Singh is a Digital Marketing consultant at Strivers Edge, renowned for driving first-page Google rankings for businesses in competitive industries. With more than 10 years in the industry, he specializes in digital and content marketing.